Saturday, February 20, 2016

Delicate Thistle Card and an Update


I received this Delicate Thistle die from Simon Says Stamp awhile ago in some happy mail. However up until this week, I hadn't had a chance to play with it. After seeing how pretty some die cuts looked just by inking them up with Distress Inks, I knew that was how I wanted to color these beautiful thistle die cuts. After I die cut them from white cardstock and embossed them, I followed the advice I saw online (or maybe in a YouTube video) somewhere and kept them in the negative space while coloring/inking them. That definitely was helpful and kept them from tearing. First I kept the die in place and inked with the darker pink through the die openings. Then the die was removed and a lighter pink and green inks were used on the rest of the die cut. I set them aside to dry while I worked on the rest of the card.


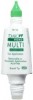
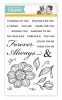
I heat embossed some white cardstock with some of the smaller "swirly" elements from the Always and Forever clear stamp set by Simon Says Stamp (it is my go-to set for so many occasions) with white embossing powder.  I then took the two pink colors I used on the thistles to ink up this panel.  I also inked up another piece of white cardstock with just the darker pink ink. Then I got out my circle dies and cut several circles in graduated sizes using Spellbinders Grand Circles, Standard Circles Large and Small and Picot Edged Circles. The sentiment was matted on the solid inked circle and then on the Picot Edge circle. The thistle die cuts were cut apart so that they could be woven into the openings in the Picot Edge circle. Tombow Multi glue was used to glue stems to the back of the circle and to glue some of the pink parts of the thistle to the sentiment panel. Other part of the thistles were popped up with 3D adhesive dots or foam squares. Some of the stems were left free to add dimension. The Picot circle was adhered to a green circle and then popped up using fun foam over the heat embossed/inked circle.


Some faux stitching added some extra interest to the green circles. The Picot Circle was accented with small rhinestones and the thistles were accented with clear Wink of Stella. An intact thistle die cut adds some interior decorating.

I'm entering this card in the following challenges:
Tuesday Throwdown Challenge #281 - Layer It Up
Simon Says Stamp Work It Wednesday Challenge - Use Something New (the Delicate Thistle die cut is new to me and so is the technique is using Distress Inks to color my die cuts)
Chocolate, Coffee & Cards Challenge #103 - Anything Goes
Sweet Stamps February Challenge - Anything Goes

UPDATES:

You may have noticed I have a new blog header. When I began blogging back in 2007, I primarily just scrapbooked. That was why I called my blog, "Steph's Scrap Happenings." Over the years, I've gradually become mostly a card-maker and paper crafter. Since I rarely scrapbook anymore and my online usernames revolve around my kitty, Sasha (aka Sasha Belle), I've decided to rename my blog Sasha Belle Designs. It's still going to look the same and I'll blog the same, it will just have a new name. I have also bought a domain name. If you want to share my blog with others, sending folks to www.SashaBelleDesigns.com is a lot easier than trying to remember the long blog address of www.StephsScrapHappenings.blogspot.com! Just a few small changes to stay technologically current. :)

I had a new watermark made to reflect my new web domain name. It was difficult to make that long blogspot address look nice on a watermark. When my friend Kathryne opened her new shop, Miss Daisy Stamps, and I saw she had custom watermarks, I was so excited. We've worked together the last few days and I am so happy with her Playful Kitty design. If you are in need of a new watermark, or adorable digis, I highly recommend you visit her shop. You won't be sorry. She is so easy to work with and does fantastic work!

In my last couple of posts I've mentioned using affiliate links. I belong to the affiliate programs at Amazon and Simon Says Stamp. Whenever you shop via one of these links, I receive a small commission at no cost to you. I greatly enjoy shopping at both of these sites and hope you will as well.

I'll link the products I used below. I hope you'll come back and visit again soon.


Wednesday, February 17, 2016

Thou Upholdest Me

Hello! It's time for another challenge at Word Art Wednesday. This week we're focusing on Psalms 41:12, "And as for me, thou upholdest me in mine integrity, and settest me before thy face for ever.," If you read the entire Psalm, you see that David has been talking about how his enemies are mistreating him and what they are saying about him. Yet in verse 12, David turns to the Lord for comfort. He knows the Lord is caring for him and that no matter what his enemies are saying, the Lord knows the truth. Oh, if I would just learn this lesson and not worry about the actions and comments of others! It's what the Lord knows about us that really matters. I would be a much happier person if I would learn this lesson.


Simon Says Stamp is our sponsor again this week. If you aren't familiar with them, they are truly a one-stop-shop! They have great customer service and speedy shipping. For my card today, I heat embossed four of the small flowers from the Always and Forever Stamp Set on watercolor paper. I used Distress inks to watercolor them. I usually use the large flower and leaves from this set so it was fun to use this smaller image this time. I cut each flower out with the smallest die in the Quadrangle Frames Wafer Dies set. I also cut out a black cardstock frame for each flower. For the card front, I inked up a piece of watercolor paper with Distress ink and then ran it through an embossing folder. After die cutting the sentiment and a coordinating mat, I popped it up with fun foam over the card front. This entire panel was matted with black cardstock. Small rhinestones finish off the card with some sparkle.


The fourth flower provides some interior decorating.

Supplies used that are not linked below: WORDart by Karen (Psalm 41:12), Recollections cardstock (black), Spellbinders Petite Ovals Large and Small

I'm entering this card in the following challenge:
Addicted to Stamps and More - Anything Goes

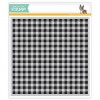
A couple weeks ago, I received some happy mail from Simon Says Stamp. It was a stamp that is being released today as part of their Reason to Smile release. I love this Gingham Background stamp and have so many ideas running through my head on how to use it! I had to ink it up right away and was thrilled with how well it stamped right out of the package. Here's a pic of that first stamped image:


I made a 4-bar card today using this pretty stamp. I stamped white cardstock with Memento ink and then used the A2 Curved Edge Die to cut the patterned paper and black cardstock mat. I die cut the Thanks Die four times and stacked them for dimension. 


A May Arts seam binding bow finishes off the front.


I just had to use the stamp again for some interior decorating!

Supplies used that are not linked below: May Arts seam binding, Recollections Black Cardstock


Thanks for visiting with me today. I hope you'll stop by the Word Art Wednesday blog to see the rest of the design team projects and to pick up your free digi WORDart. Also, don't forget to visit Simon Says Stamp to see the entire new Reason to Smile release and to purchase all your papercrafting needs.

The supplies I used on today's cards are linked below (affiliate links used where possible).


Wednesday, February 3, 2016

I Am the Way, the Truth and the Life

Hello!! It's time for a new challenge at Word Art Wednesday. This week we're focusing on John 14:6, "Jesus saith unto him, I am the way, the truth, and the life: no man cometh unto the Father, but by me." Many people today want to tell us "all roads lead to Heaven" and "it doesn't matter what you believe as long as you are strong in your faith." However, Jesus tells us differently. He says that He is THE way, THE truth and THE life and that no one come to the Father except through Him. That's pretty simple to understand. Salvation is through Jesus Christ alone. So often, we try to make it so much more complicated than it really is. Maybe it's pride that tells us that we have to do something to earn it. However, in reality salvation is so simple that even a small child can understand it. Christ has given us the free gift of salvation. Have you accepted Him?


This card uses this week's MOJO Monday Sketch. I stayed pretty true to the sketch except for switching out the top most layer from a square to a rectangle. There are lots of layers and faux stitching.


There are 3 colors of sequins in two different sizes. The larger pink and green sequins were topped with a small rhinestone. The smaller white sequins were topped with some of my favorite Star Dust Stickles. The paper rose was also accented with some stickles for more sparkle. As a last touch, the pink flowers in the patterned paper were given a coat of clear Wink of Stella.

Supplies (affiliate links used when possible):
Cardstock: Georgia Pacific (white), Bazzill (yellow)
Patterned Paper: Chickaniddy Crafts (6x6 pad)
Stamp: WORDart by Karen (John 14:6 digi)
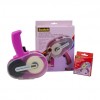
Tools/Embellishments: The Paper Studio (pink and green sequins), Pretty Pink Posh (Marshmallow sequins 4mm), Uniball Signo White gel pen, Zig Wink of Stella (clear), My Favorite Things Die-namics (Mini Scallop Edge), Stickles (Star Dust), Want 2 Scrap baby bling, Hobby Lobby (ribbon), Creative Memories black marker, paper rose from my stash, Fiskars Paper Trimmer, Scotch Pink Advanced Tape Glider

I'm entering this card in the following challenges:
MOJO Monday (MOJO433) - Sketch
Craft Your Passion Challenge #297 - Anything Goes
Eureka Stamps Challenge #178 - Add Some Sparkle (stickles, Wink of Stella and bling)
Hiding in My Craft Room Challenge #236 - Freestyle
Crop Stop Linky #12 - Use something available in the Crop stop Store (Star Dust Stickles)

Thanks for stopping by today. I hope you'll be able to visit the Word Art Wednesday blog for more inspiration and your free digi.

Wednesday, January 27, 2016

Thank You {Wolf}

I was asked to make a thank you card with a wolf on it. Since I didn't have a wolf digi or stamp, I got to go shopping. :) What a shame, right? Anyway, I found some really nice wolf digis at Stamp 'n Doodle. I ordered the wolf digi you see on today's card and they sent me a bonus digi of a trio of wolves. Great value for the price!!  The image was colored with Copics. I added clear Wink of Stella to his eyes for a little shimmer and Glossy Accents to his nose to help give him the wet nose look. I used a Mojo Monday sketch (MOJO414) for the card design. I was recently gifted a great outdoors 12 x 12 paper pack and used 4 of the papers in the stack on this card. The sentiment was heat embossed onto the fishtail banner. Some faux stitching, dry embossing and a twill ribbon finish it off.

Supplies:
Cardstock: Georgia Pacific (white- image), Recollections (kraft)
Patterned Paper: GCD Studios (The Great Outdoors 12 x 12 pad) 
Stamps: Stamp 'n Doodle (Wolf Portrait digital stamp), Inkadinkado (Chelsea Sentiments clear stamp set)
Ink: VersaFine (Onyx Black), Distress Ink (Tea Dye)
Copic Markers: W1, 3, 5, 7; YG0000; Y17, 32; B0000
Tools/Embellishments: Wink of Stella (clear), Glossy Accents, Cuttlebug embossing folder (Forest Branches), Stampin Up (Crystal Clear embossing powder, corner rounder), The Kraft Outlet (seam binding ribbon), Staedtler Triplus fine tip marker (brown)

I'm entering this card in the following challenges:
Craft Your Passion Challenge #296 - Anything Goes
Tuesday Throwdown Challenge #278 - Anything Goes
Simon Says Stamp Wednesday Challenge - Anything Goes


I'd like to encourage you to participate in Kathy Rac's 4th 30 Day Coloring Challenge. The purpose of the challenge is to encourage you to do a little coloring every day, even if just for 5 min. If you can't color every day that's OK too. Jump in and out of the challenge as you are able. You can use any coloring medium and images you choose. I've participated in the past challenges (not every day) and really had a lot of fun. It also has helped me build up my stash of colored images and given me the necessary push to try new coloring mediums. See the details on Kathy's blog, The Daily Marker.

Thanks for visiting with me today. I hope you'll come back soon.

Tuesday, January 26, 2016

I Thought of You Today Version 2


I have a friend that sometimes "shops" for cards on my blog. She will give me the title of a card and ask me to re-create it for her. After my recent, My Favorites from 2015 post, I received a request from her for several cards. This is one of them and I think it is my favorite of 2015. There's a challenge at Scrapbook Blessings Club this month (hurry you still have time to participate - it closes at 11PM EST Jan 31st) that asks you to take your favorite card of 2015 and use it as inspiration for a new card. You can do a direct re-creation or just use it as a jumping off point. As long as the original card can be identified, you are good to go. I thought this challenge sounded fun so I'm linking up my card there.

This is my original card.


As you can see I changed out the papers and colors a bit. I also changed the rhinestones for pearls. I put the vellum in front of the shaker materials instead of on top of the background patterned paper. Truthfully, the only reason I did that is because I forgot exactly how I made the original. :) However, I think the pink sequins in the shaker sort of look like rose petals.

 I still used sequins on the card front though I changed up the color and size of them. I also left off the faux stitching.


Star Dust Stickles add some sparkle to the flowers and to the white sequins on the card front. All in all, very close to the original but slightly updated. The finished card is 5.5" square.

Supplies used on the new version:
Cardstock: Georgia Pacific (white), Bazzill (pink, vellum), Recollections (black)
Patterned Paper: Authentique (Classique Pretty 6 x 6 pad)
Ink: VersaFine (Onyx Black)
Tools/Embellishments: Spellbinders Dies (Standard Circles Small, Picot Edge Circles), Prima Say It in Pearls swirls, flowers (gift item from my stash - I think they are Recollections), Stickles (Star Dust), Pretty Pink Posh 4mm Marshmallow sequins, Pink Sequins in shaker (The Paper Studio)

I'm also linking this new version up at the Fun Cuts Alphabet Challenge - J is for Jewels.
  
Thanks for visiting with me today. Please come back tomorrow when I'll have a brand new card to share with you.

Friday, January 22, 2016

Birthday Wishes


My mother-in-law's birthday was this week and she loves flowers. So I used an old MOJO Monday sketch (MOJO415) for the card layout and one of my favorite Mark's Finest Papers clear stamp images to make a card for her. The flowers were colored with Copic markers and the centers were accented with Stickles. I heat embossed the sentiment on the tag.


For the interior decorating, I heat embossed the sentiment and used a Deco Corner Chomper on the corners.

Supplies:
Cardstock: Recollections (kraft), Bazzill (pink), Georgia Pacific (image)
Patterned Paper: My Mind's Eye (Dolled Up 6x6 pad)
Stamps: Mark's Finest Papers clear stamp set (Dogwood Blossoms), Inkadinkado clear stamp set (Chelsea Sentiments), Stampabilities wood mount stamp (May Your Birthday Be Filled)
Ink: Memento (Tuxedo Black), VersaFine (Onyx Black)
Tools/Embellishments: Copic Markers, WRMK Corner Chomper, Offray Lace, The Twinery Baker's Twine (pink), Studio G Baker's Twine (brown), Spellbinders dies (Classic Rectangles Large, Labels Four), Stickles (Star Dust), Stampin Up! embossing powder (Crystal Clear)

I'm entering this card in the following challenges:
Hiding in My Craft Room Challenge #234 - Embossing
Addicted to Stamps and More Challenge #177 - Make Your Mark (I used Copics)
Outlawz Paper A La Mode Challenge - Birthdays
Craft Your Passion Challenge #295 - Anything Goes
Shopping Our Stash Challenge #235 - 3, 2, 1 (3 stamp sets/companies, 2 colors of baker's twine, 1 patterned paper)
Fab 'n Funky Challenge #288 - Buttons or bow or both (I chose bows)
Really Reasonable Ribbon Challenge #133  - Show Me the Pink (with ribbon or trim)

Thanks for stopping by to visit with me today. I hope you'll come back soon.

Thursday, January 21, 2016

I Will Go Before Thee

I'm quite tardy with this post since the new Word Art Wednesday challenge started yesterday. I've been under the weather and haven't been able to be on the computer. I'm still in the "no energy" phase of recovery but definitely better. Anyway, this week the challenge focus verse is Isaiah 45:2, "I will go before thee, and make the crooked places straight: I will break in pieces the gates of brass, and cut in sunder the bars of iron." This is a wonderful promise from the Lord that He will go before us to straighten out the path. That means that He knows what lies before us and will help us with our journey. The rest of this verse indicates that this not only involves preparing the pathway before us but also breaking through the obstacles that would hinder our progress. So, when it seems like the Lord has asked us to do a difficult or even impossible task, just remember this verse. If He has asked you to do something, He'll prepare the way for you and help you get through those hindrances to accomplishing the task. This doesn't mean there will be no problems along the way, but it does mean He's there, He knows the best way through/around/over the obstacles and He will help you navigate the journey.


For my card design this week, I used an old Mojo Monday sketch (MOJO406). I kept to a masculine theme this week with the colors and designs on my patterned papers. The background cardstock was embossed with an embossing folder and then, using a direct to paper technique, inked with distress ink to bring out the embossed pattern. The edges of all the other papers were inked as well.

I went back to a technique I used a lot in my scrapbooking days: covering chipboard with patterned paper. After adhering the stars to the back of the patterned paper, I used my new fingertip craft knife to cut them out. It works so much better for me than a traditional straight craft knife. The edges of the stars were inked with distress ink. After adhering the stars to the card front, they were given a coat of Glossy Accents.

Supplies:
Cardstock: Recollections (cream, kraft)
Patterned Paper: My Mind's Eye (Remarkable 6x6 pad)
Stamp: WORDart by Karen (Isaiah 45:2)
Ink: Distress Ink (Tea Dye)
Tools/Embellishments: Heidi Swapp Chipboard Stars, The Paper Studio embossing folder (Caning), Nicole 5mm Adhesive Nail Heads, Glossy Accents, The Paper Studio Burlap Ribbon

I'm entering this card in the following challenges:
Cute Card Thursday Challenge #409 - Just Boys (use a masculine theme)
Aud Sentiments Challenge #147 - Anything Goes
Craft Your Passion Challenge #295 - Anything Goes
Shopping Our Stash Challenge #235 - 3, 2, 1 (3 stars, 2 patterned papers, 2 cardstocks, 1 ribbon, 1 embossing folder)
Crop Stop Linky Party #12 - Anything Goes using something from Crop Stop Store (I used Glossy Accents & Tea Dye Distress Ink)
Pile It On Challenge #99 - Use Something with your first initial (I used "S" for Stars)
Eureka Stamps Challenge #176 - Pile It On
Hiding in My Craft Room Challenge #234 - Embossing

I hope you'll visit the Word Art Wednesday blog for lots of inspiration using this week's FREE digi WORDart. We'd love to have you play along with us. Remember you have 2 weeks to link up your projects.

LinkWithin

Related Posts Plugin for WordPress, Blogger...