It is time for another Word Art Wednesday Challenge. This week we're focusing on Matthew 11:29, "Take my yoke upon you and learn of me; for I am meek and lowly in heart: and ye shall find rest unto your souls." The Lord wants us to get to know Him. That fact alone amazes me. He wants me to spend time with Him so that I can get to know Him better. And what does He promise that I'll find if I do take the time to get to really know Him? I'll find rest for my soul. We are in an incredibly busy season of life and physical rest is in short supply. While I realize this verse is talking about spiritual rest, I am open to any and all rest I can get! As we place our trust in the Lord and experience spiritual rest, this will lead to emotional rest. We can be less anxious about the things around us and our circumstances. This emotional rest then frequently leads to being able to get better physical rest. What a blessing!!
I wanted a card that would look special and yet be easy to make. For me that means a fancy fold card. I remembered this card I made last August when I was a guest designer for Our Daily Bread Designs. I loved that fold and decided to bring it back for today's card. For the card I used one piece of cardstock measuring 4.25" x 11" and
another measuring 2.5" x 11". Each piece was scored along the 11" side
at 2.75" and 5.5". A Scor-Pal makes the measuring and scoring so easy. A
bone folder helps get crisp folds on each piece.
Bugaboo stamps was kind enough to provide this 4 Block Tulip Digi Stamp for me to use for today's card. Thanks Bugaboo!! I colored it with Copic markers and accented it with a white gel pen and some star dust stickles. After cutting it out, I double matted it before popping it up on the card with foam tape. I used 3 Standard Square (Large and Small) Spellbinders dies to die cut the verse panel and mats.
The teal cardstock behind the image and verse panels and on one of the interior panels was dry embossing used a Cuttlebug embossing folder and my Grand Calibur machine. A white panel provides a place to write a short message to the recipient. Star Dust Stickles on the patterned paper design finish off the card.
Supplies:
Cardstock: Recollections (teal), Georgia Pacific (white)
Patterned Paper: Recollections (Teal Paisley)
Stamps: WORDart by Karen, Bugaboo Digi Stamps (4 Block Tulip Square)
Copics: V20, 22, 25; G16, 14; R22, 24, 27, YG23, 25; B01
Tools/Embellishments: Spellbinders Dies (Classic Squares Large and Small), Stickles (Star Dust), Cuttlebug embossing folder (Anna Griffin-Honeysuckle Vines), Uni-Ball Signo White Gel Pen
I'm entering this card in the following challenges:
Mod Squad Challenge - Ready for Spring
Scor-Pal More than One Fold Challenge - All Things Bright & Beautiful
Crafty Sentiments - Anything Goes
Crafty Hazelnut's Patterned Paper Challenge - Must use patterned paper
Dare 2B Artzy - Favorite Colors (I love teal in all of it's shades and I love green - this card uses lots of both)
Thanks for visiting with me today. I hope you'll come back again soon.
Showing posts with label Z-Fold. Show all posts
Thursday, March 29, 2018
Tuesday, January 2, 2018
My Favorite from 2017
Today, I'm back with some of my favorites of 2017. I missed posting my favorites from 2016, but when I posted my 2015 favorites, I kept the number to an even dozen. That's what I did this year too. I'm posting them in date order as they appeared on my blog. I hope you enjoy the look back. You can click the link on the card title to go back to the original post for full details.
Rejoice Evermore (fourth card in this post)
A Turtle and Her Books
Be Joyful
Barista Brentwood Owl
Declare the Works of the Lord
Tickled Pink Birthday
When You Feel Like Quitting
Land That I Love
Someone Remembers, Someone Cares
How You Bean?
Your Kindness Warms My Heart
Brentwood Birthday
Thanks for taking this trip down Memory Lane with me. Apparently, some of your favorites are mine too. :) I'll be back tomorrow with a card for the first challenge in 2018 for Word Art Wednesday. I hope you'll come back to visit soon.
Rejoice Evermore (fourth card in this post)
A Turtle and Her Books
Be Joyful
Barista Brentwood Owl
Declare the Works of the Lord
Tickled Pink Birthday
When You Feel Like Quitting
Land That I Love
Someone Remembers, Someone Cares
How You Bean?
Your Kindness Warms My Heart
Brentwood Birthday
Thanks for taking this trip down Memory Lane with me. Apparently, some of your favorites are mine too. :) I'll be back tomorrow with a card for the first challenge in 2018 for Word Art Wednesday. I hope you'll come back to visit soon.
Wednesday, August 2, 2017
When You Feel Like Quitting
{If you are looking for my Word Art Wednesday post, either scroll down or click here.}
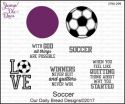
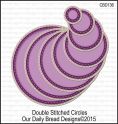
The August New Release from Our Daily Bread Designs has a sports theme and includes 2 stamp sets, one die set and 7 stamp and die duos. I love these duos because you get the stamp set AND the coordinating die all in one package. Each stamp and die duo set features a different sport so making cards for the athletes in your life is a snap. The coordinating sentiments and Scriptures are so appropriate too...and not just for being successful in sports. For my first card this month, I chose to work with the Soccer Stamp/Die Duo. After stamping two of the sentiments on white card stock, I die cut and matted them with the Double Stitched Circle dies to keep the ball theme going.
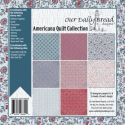
The Americana Quilt Paper Pad is perfect for sports cards. Some of the words in the sentiments have open letters. For a little added interest and sparkle, I used a metallic gel pen to fill in these letters. After stamping the soccer ball and die cutting it with the coordinating die, I wanted to add something a little unexpected. The soccer ball is mounted on an action wobble so that it moves back and forth. I thought this would be a nice surprise for the recipient. Enamel Accents in white was used to embellish the diagonal corners of the card.
For the card design, I was inspired by this Double Z-Fold tutorial over on Beccy's Place. For the card I used one piece of cardstock measuring 4.25" x 11" and another measuring 2.5" x 11". Each piece was scored along the 11" side at 2.75" and 5.5". A Scor-Pal makes the measuring and scoring so easy. A bone folder helps get crisp folds on each piece. This type of card really lets your patterned paper shine and is a great way to showcase the soccer ball image and these fantastic sentiments. I used a white card base so that I could write a message to the recipient on the back. This allows them to display the card without the message also being on display.
Our Daily Bread Designs Products:
Other Supplies Used:
Cardstock: Georgia Pacific (white), Cor'dination (Royal)
Ink: VersaFine (Onyx Black)
Tools/Embellishments: Action Wobbler, Ranger Enamel Accents (white), Gelly Roll Metallic Pen (red)
I'm entering this card in the following challenges:
Scor-Pal More Than One Score Challenge #40 - 3D Cards (the Scor-Pal makes it so easy to get crisp folds to help this card stand up properly)
Crafty Sentiments - Anything Goes
Crafty Hazelnut's Patterned Paper Challenge - Must Use Patterned Paper
Crop Stop Challenge #30 - Use items/brands found in the Crop Stop Online store (I used items from Ranger, Fiskars, and Cuttlebug)
Thanks for stopping by today. I hope you'll check out the August New Release and be sure to visit the ODBD blog and check out all the samples made by the Design Team. So many creative and pretty ways to use the new release sets.
Labels:
Cards,
challenges,
Dies,
Encouragement,
Fancy Fold,
Masculine,
ODBD,
Z-Fold
Wednesday, March 1, 2017
Rejoice Evermore
Happy Wednesday!! It's time for a new challenge at Word Art Wednesday. This week our theme verse is from 1 Thessalonians 5:16-17, "Rejoice evermore. Pray without ceasing." Obviously we cannot be praying 24/7. You have to sleep sometime. :) Seriously, I think the writer is talking about the attitudes of our heart. We should have a heart that is consistently rejoicing.We should have a prayerful attitude at all times. Prayer isn't something that you can only do in church. Nor do we have to be on our knees with our eyes closed and hands folded. Prayer, after all, is a conversation with God. We can (and should) slip in and out of that conversation all day long.
This week our sponsor is Taylored Expressions. They were extra generous with the Design Team and gave us some wonderful products to use. I have so many ideas running through my head on how to use the various stamp sets. I can't wait to get back to my craft room! You will definitely being seeing these sets again! I couldn't keep my projects to just one this week so I have four to share with you. Since there are so many, I'm just going to give a supply list after each card rather than linking all the supplies at the end of my post.
For my first card, I printed this week's free Word Art Wednesday WORDart digi directly only my patterned paper. On the background patterned paper, I repeatedly stamped the Graphic Greetings Redeemer stamp with Chocolate Truffle hybrid ink using the second generation stamping technique. I just wanted a subtle look and it turned out just like I hoped it would. I've been needing a good dark brown ink and this Chocolate Truffle ink is just what I needed. Since it's a hybrid ink, I will be able to use it with my Copics as well as watercolor techniques. Love it! I used some die cut borders to set off the sentiment panel. Before adhering this panel to the background, I wrapped light brown baker's twine around it several times and then tied a small bow. Faux stitching, a few pearls and some clear sequins finish off this card. This is a soft "quiet" card, but I really like letting the papers and the subtle stamping carry the design. The card is 5.5" square.
Supplies Used:
Cardstock: Recollections (cream), Bazzill (kraft)
Patterned paper: WRMK Anthologie 6x6 (this is an old pad of paper and these were my last bits from it)
Stamps: WORDart by Karen (1 Thessalonians 5:16-17), Taylored Expressions (Graphic Greetings Redeemer)
Ink: Taylored Expressions Premium Hybrid mini ink pad (Chocolate Truffle)
Dies: Sweet 'n Sassy Stamps (Lacey Eyelet Border - retired)
Embellishments: The Paper Studio (pearls), Simon Says Stamp (Assorted Moonshine Sequins), Staedtler Fine Tip Marker (Brown), Studio G (brown baker's twine)
For my next card I went bold and bright. I repeatedly stamped the image from the Cherish Every Moment stamp set on my cardstock. After coloring the flowers and background with various Copic markers, I cut it to 4" square. I heat embossed the sentiment from this set on a strip of Premium Vellum and centered the greeting on the floral panel. After attaching the vellum on the back of the floral panel it was mounted on black cardstock and then adhered to a 4.25" square card base. A few turquoise and clear sequins were all the embellishment this bright, cheery card needed.
Supplies Used:
Cardstock: Georgia Pacific (white), Recollections (black), Taylored Expressions (Premium Vellum)
Stamps: Taylored Expressions (Cherish Every Moment)
Ink: Memento (Tuxedo Black), VersaMark
Embellishments: Copic Markers, The Paper Studio (turquoise sequins), Simon Says Stamp (White Fine Detail embossing powder, Assorted Moonshine sequins
I just love the Graphic Greetings Redeemer stamp. It has so many wonderful names of our Lord. I just had to do a card that let it really be the focal point. I started with a Z-fold card and then rotated it 90 degrees so that the card opens up vertically (maybe the picture below will help that make sense). Other than a die cut border and matting, there are no other embellishments to take to focus away from this great stamped image.
When you open the card, you can still see the focal image and there is a panel to allow you room to write a message to the recipient.
Supplies Used:
Cardstock: Georgia Pacific (white), Recollections (black)
Patterned Paper: Basic Gray (Hillside 6x6 pad)
Stamp: Graphic Greetings Redeemer
Ink: VersaFine (Onyx Black)
Die: Sweet 'n Sassy Stamps (Lacey Eyelet Border - retired)
For my last card, I used an Operation Write Home Sketch (#123) for my starting point. Our daughter works with books (Book Reviewer, Book Podcast co-host and Book 'Tuber) and I'd had been looking for a good book stack stamp for a long time. When I saw the In Other Words - Read set, I knew I had to have it. The image and sentiments are perfect for her. I have so many ideas for other projects but we'll have to get to them another time. :) After stamping and coloring the image with Copic markers, I fussy cut it out. This sentiment is such fun and has such a bold look. The stack of books is popped up on foam squares and enamel dots add the final embellishment.
Supplies Used:
Cardstock: Georgia Pacific (white), Recollections (black)
Patterned Paper: Basic Gray (Hillside 6x6 pad)
Stamps: Taylored Expressions (In Other Words - Read)
Ink: Memento (Tuxedo Black), VersaFine (Onyx Black)
Embellishments: Copic Markers, MME enamel dots
If you've made it this far, thanks for hanging in there with me. I thoroughly enjoyed using these Taylored Expressions stamps and products. I hope you'll stop by to visit their online store. I'm sure you'll find something there that you will love. They even have a great Loyalty Program. You can set up an account and check out the details here. I know I will be wanting more of their stamps and inks. The stamps stamp so well right out of the package. They are nice cling stamps and work well with the MISTI or an acrylic block. Thanks again to Taylor for her generosity.
Some of their Design Team has joined ours so there is lots of Taylored Expressions inspiration on the Word Art Wednesday blog today. Be sure to grab a cup of coffee/tea/cappuccino, sit back and enjoy all the fantastic projects. Be sure to pick up your free digi. Thanks for visiting with me today. I hope you'll visit again soon.
This week our sponsor is Taylored Expressions. They were extra generous with the Design Team and gave us some wonderful products to use. I have so many ideas running through my head on how to use the various stamp sets. I can't wait to get back to my craft room! You will definitely being seeing these sets again! I couldn't keep my projects to just one this week so I have four to share with you. Since there are so many, I'm just going to give a supply list after each card rather than linking all the supplies at the end of my post.
For my first card, I printed this week's free Word Art Wednesday WORDart digi directly only my patterned paper. On the background patterned paper, I repeatedly stamped the Graphic Greetings Redeemer stamp with Chocolate Truffle hybrid ink using the second generation stamping technique. I just wanted a subtle look and it turned out just like I hoped it would. I've been needing a good dark brown ink and this Chocolate Truffle ink is just what I needed. Since it's a hybrid ink, I will be able to use it with my Copics as well as watercolor techniques. Love it! I used some die cut borders to set off the sentiment panel. Before adhering this panel to the background, I wrapped light brown baker's twine around it several times and then tied a small bow. Faux stitching, a few pearls and some clear sequins finish off this card. This is a soft "quiet" card, but I really like letting the papers and the subtle stamping carry the design. The card is 5.5" square.
Supplies Used:
Cardstock: Recollections (cream), Bazzill (kraft)
Patterned paper: WRMK Anthologie 6x6 (this is an old pad of paper and these were my last bits from it)
Stamps: WORDart by Karen (1 Thessalonians 5:16-17), Taylored Expressions (Graphic Greetings Redeemer)
Ink: Taylored Expressions Premium Hybrid mini ink pad (Chocolate Truffle)
Dies: Sweet 'n Sassy Stamps (Lacey Eyelet Border - retired)
Embellishments: The Paper Studio (pearls), Simon Says Stamp (Assorted Moonshine Sequins), Staedtler Fine Tip Marker (Brown), Studio G (brown baker's twine)
For my next card I went bold and bright. I repeatedly stamped the image from the Cherish Every Moment stamp set on my cardstock. After coloring the flowers and background with various Copic markers, I cut it to 4" square. I heat embossed the sentiment from this set on a strip of Premium Vellum and centered the greeting on the floral panel. After attaching the vellum on the back of the floral panel it was mounted on black cardstock and then adhered to a 4.25" square card base. A few turquoise and clear sequins were all the embellishment this bright, cheery card needed.
Supplies Used:
Cardstock: Georgia Pacific (white), Recollections (black), Taylored Expressions (Premium Vellum)
Stamps: Taylored Expressions (Cherish Every Moment)
Ink: Memento (Tuxedo Black), VersaMark
Embellishments: Copic Markers, The Paper Studio (turquoise sequins), Simon Says Stamp (White Fine Detail embossing powder, Assorted Moonshine sequins
I just love the Graphic Greetings Redeemer stamp. It has so many wonderful names of our Lord. I just had to do a card that let it really be the focal point. I started with a Z-fold card and then rotated it 90 degrees so that the card opens up vertically (maybe the picture below will help that make sense). Other than a die cut border and matting, there are no other embellishments to take to focus away from this great stamped image.
When you open the card, you can still see the focal image and there is a panel to allow you room to write a message to the recipient.
Supplies Used:
Cardstock: Georgia Pacific (white), Recollections (black)
Patterned Paper: Basic Gray (Hillside 6x6 pad)
Stamp: Graphic Greetings Redeemer
Ink: VersaFine (Onyx Black)
Die: Sweet 'n Sassy Stamps (Lacey Eyelet Border - retired)
For my last card, I used an Operation Write Home Sketch (#123) for my starting point. Our daughter works with books (Book Reviewer, Book Podcast co-host and Book 'Tuber) and I'd had been looking for a good book stack stamp for a long time. When I saw the In Other Words - Read set, I knew I had to have it. The image and sentiments are perfect for her. I have so many ideas for other projects but we'll have to get to them another time. :) After stamping and coloring the image with Copic markers, I fussy cut it out. This sentiment is such fun and has such a bold look. The stack of books is popped up on foam squares and enamel dots add the final embellishment.
Supplies Used:
Cardstock: Georgia Pacific (white), Recollections (black)
Patterned Paper: Basic Gray (Hillside 6x6 pad)
Stamps: Taylored Expressions (In Other Words - Read)
Ink: Memento (Tuxedo Black), VersaFine (Onyx Black)
Embellishments: Copic Markers, MME enamel dots
If you've made it this far, thanks for hanging in there with me. I thoroughly enjoyed using these Taylored Expressions stamps and products. I hope you'll stop by to visit their online store. I'm sure you'll find something there that you will love. They even have a great Loyalty Program. You can set up an account and check out the details here. I know I will be wanting more of their stamps and inks. The stamps stamp so well right out of the package. They are nice cling stamps and work well with the MISTI or an acrylic block. Thanks again to Taylor for her generosity.
Some of their Design Team has joined ours so there is lots of Taylored Expressions inspiration on the Word Art Wednesday blog today. Be sure to grab a cup of coffee/tea/cappuccino, sit back and enjoy all the fantastic projects. Be sure to pick up your free digi. Thanks for visiting with me today. I hope you'll visit again soon.
Wednesday, August 13, 2014
Prima Shabby Chic
Hi! Happy Wednesday!! I hope your week is going well. This week's focus verse at Word Art Wednesday is Colossians 1:27, "To whom God would make known what is the riches of the glory of this mystery among the Gentiles; which is Christ in you, the hope of glory." We can read the Bible daily all our lives and still learn something new each time we read it. God wants to share His riches with us. When we accept Christ as our Savior, the Holy Spirit comes to live within us and helps shed light on what we're reading. Too often, we read simply to say we've have read our Bible for the day. We should stop to ask the Lord to show us what He has for us to learn in what we read that day.
I received a notebook project kit as a challenge prize a couple weeks ago. It came with several beautiful Prima 6x6 papers, some ivory and pink cardstock, and LOTS of embellishments. I decided to use it for cards instead of the intended notebook. For this reason, I don't know the brand of some of the items on today's card. This is a 5.5" square (when folded flat) Z-fold card. The verse font had an elegance to it that went very well with these papers. Shabby chic is a challenge style for me but with these papers....this is my version of it. The Lattice Motif under the verse panel is accentd with small pearls.
A matching lattice die cut on the inside provides a spot to write a message to the recipient.
There is lots of interior decorating on this card. I'm not sure how well it shows up in the picture but there is a pretty pearl flourish on the left interior panel. LOTS of pearls on this card!!
Supplies:
Cardstock: Georgia Pacific (white), Unknown (pink, gray/brown)
Patterned Paper: Prima
Stamp: WORDart by Karen ()
Tools/Embellishments: My Favorite Things die (Postage Stamp Edge), Spellbinders dies (Classic Ovals Large and Small, Lattice Accents, pearls (Want2Scrap, The Paper Studio, Michael's), ribbon (unknown), flower (Prima)
I'm entering this card in the following challenges:
Digi Chooseday Week 31 Challenge - Shabby Chic
Sentimental Sunday Challenge #219 - Decorate card inside and out
Scrapbook Blessings Club Challenge #26 - Anything Goes
Fan-tastic Tuesday Challenge #48 - Anything Goes
Crafty Hazelnut's Patterned Paper Challenge - Must cover card with Patterned Paper
Crafts Galore Encore Challenge - Anything Goes
V's Sweet Ideas Challenge #26 - Anything Goes
Thanks for stopping by today. I hope you'll be back to visit often. There is lots more inspiration over that the Word Art Wednesday blog and a free digi for you to snag.
I received a notebook project kit as a challenge prize a couple weeks ago. It came with several beautiful Prima 6x6 papers, some ivory and pink cardstock, and LOTS of embellishments. I decided to use it for cards instead of the intended notebook. For this reason, I don't know the brand of some of the items on today's card. This is a 5.5" square (when folded flat) Z-fold card. The verse font had an elegance to it that went very well with these papers. Shabby chic is a challenge style for me but with these papers....this is my version of it. The Lattice Motif under the verse panel is accentd with small pearls.
A matching lattice die cut on the inside provides a spot to write a message to the recipient.
There is lots of interior decorating on this card. I'm not sure how well it shows up in the picture but there is a pretty pearl flourish on the left interior panel. LOTS of pearls on this card!!
Supplies:
Cardstock: Georgia Pacific (white), Unknown (pink, gray/brown)
Patterned Paper: Prima
Stamp: WORDart by Karen ()
Tools/Embellishments: My Favorite Things die (Postage Stamp Edge), Spellbinders dies (Classic Ovals Large and Small, Lattice Accents, pearls (Want2Scrap, The Paper Studio, Michael's), ribbon (unknown), flower (Prima)
I'm entering this card in the following challenges:
Digi Chooseday Week 31 Challenge - Shabby Chic
Sentimental Sunday Challenge #219 - Decorate card inside and out
Scrapbook Blessings Club Challenge #26 - Anything Goes
Fan-tastic Tuesday Challenge #48 - Anything Goes
Crafty Hazelnut's Patterned Paper Challenge - Must cover card with Patterned Paper
Crafts Galore Encore Challenge - Anything Goes
V's Sweet Ideas Challenge #26 - Anything Goes
Thanks for stopping by today. I hope you'll be back to visit often. There is lots more inspiration over that the Word Art Wednesday blog and a free digi for you to snag.
Friday, March 15, 2013
March Digi Release & SNSDC96
This is an exciting day over at the Sweet 'n Sassy Digi Challenge Blog. Not only is it time for another fun challenge, but it's also the day we get to showcase the March Digi Release. This month's release is a great reminder that spring is on the way! The images are fun to color or paper piece and the sentiments are fantastic for your spring cards and/or encouragement cards all year round.
I got to play with the Be Encouraged sentiment set and the Tulip Block digi stamp. The challenge this week is to make a Z-fold card. I've made one once before. You can see that card here. Beate has a great tutorial on how to make a Z-fold card on her blog here. Completely folded, my card is 5.25" high by 6" wide. The base cardstock is 5.25" x 12". I scored it on the 12" side at 3" & 6". I folded it as a normal card on the 6" score line and then folded the front backwards at the 3" score line.
I colored the Tulip Block with Copics and accented it with a glitter pen and then some stickles. It is matted and framed with patterned paper and then popped up on the card with dimensionals. A scalloped border and rhinestone flourish finish off the front panel.
For the inside, I used the same scalloped border die to cut the edge of my card and the pink and green patterned papers. I embossed the green patterned paper with an M-bossabilities folder and accented the center of each flower with a bit of stickles. I matted one of the sentiments from the Be Encouraged set and left room on this panel for a short message. A Bow-Easy was used to tie a triple bow and I added my all-time favorite embellishment, pearls, to the ribbon for some extra pizzazz. A pink rose finishes off the bow.
The cardstock I used for the base is a marbled green. I'm not sure if you can see that in the photos but it really sets off the green paper and the green flower stem well. When the card is completely closed, the tulip panel hides the interior sentiment panel.
Supplies:
Cardstock: Wassau (green marbled), Copic (image and sentiment panels)
Patterned Paper: The Paper Studio
Stamps: Sweet 'n Sassy Digis (Be Encouraged, Tulip Block)
Copics: R81, 83, 85, YG03, 05, BG10)
Embellishments/Tools: Spellbinders (Lacey Squares, Classic Squares Small, Big Scalloped Border Petites, M-bossabilities Splendid-B), rhinestone flourish (Recollections), pearls (The Paper Studio), flower (Prima), ribbon (Offray), Stickles (Star Dust), Sakura Gelly Roll pen (Clear Star)
I'm entering this card in the following challenges:
Word Art Wednesday #71 - Anything Goes
Cute Card Thursday - Anything Goes
Scrap Creations - Use Favorite Embellishment (mine is pearls, followed closely by bling flourishes, ribbon & flowers)
Catered Crop - Frame or mat
Clearly Inspired Challenge #70 - Die Cuts
Sentimental Sunday #145 - 3 embellishments that start with B (bow, bling, pink bloom)
Stamptacular Sunday #206 - Dies
Ribbon Carousel #78 - Spring is in the Air
Dream Valley Challenge - Mother's Day/Card for Female
Terrifically Thrilling Thursday - Roll 'em {I rolled 1 (die/punch), 5 (dimensionals), 7 (glitter)}
Craft Your Passion #153 - 2 colors plus neutral (nothing says spring to me like pink flowers)
Spark Your Creativity Challenge #7 - Anything Goes
{Cupcake Inspirations} Challenge 201 - I was inspired by the floral motif and the overal pink and green color scheme
Please be sure to leave a comment below and visit the rest of the design team's blog and leave a comment. One of us is a "mystery blogger" and a random comment will be chosen from her blog to receive the entire March Digi Release.
Thanks for stopping by today. Come back soon. I have another project with this release to show you.
I got to play with the Be Encouraged sentiment set and the Tulip Block digi stamp. The challenge this week is to make a Z-fold card. I've made one once before. You can see that card here. Beate has a great tutorial on how to make a Z-fold card on her blog here. Completely folded, my card is 5.25" high by 6" wide. The base cardstock is 5.25" x 12". I scored it on the 12" side at 3" & 6". I folded it as a normal card on the 6" score line and then folded the front backwards at the 3" score line.
I colored the Tulip Block with Copics and accented it with a glitter pen and then some stickles. It is matted and framed with patterned paper and then popped up on the card with dimensionals. A scalloped border and rhinestone flourish finish off the front panel.
For the inside, I used the same scalloped border die to cut the edge of my card and the pink and green patterned papers. I embossed the green patterned paper with an M-bossabilities folder and accented the center of each flower with a bit of stickles. I matted one of the sentiments from the Be Encouraged set and left room on this panel for a short message. A Bow-Easy was used to tie a triple bow and I added my all-time favorite embellishment, pearls, to the ribbon for some extra pizzazz. A pink rose finishes off the bow.
The cardstock I used for the base is a marbled green. I'm not sure if you can see that in the photos but it really sets off the green paper and the green flower stem well. When the card is completely closed, the tulip panel hides the interior sentiment panel.
Supplies:
Cardstock: Wassau (green marbled), Copic (image and sentiment panels)
Patterned Paper: The Paper Studio
Stamps: Sweet 'n Sassy Digis (Be Encouraged, Tulip Block)
Copics: R81, 83, 85, YG03, 05, BG10)
Embellishments/Tools: Spellbinders (Lacey Squares, Classic Squares Small, Big Scalloped Border Petites, M-bossabilities Splendid-B), rhinestone flourish (Recollections), pearls (The Paper Studio), flower (Prima), ribbon (Offray), Stickles (Star Dust), Sakura Gelly Roll pen (Clear Star)
I'm entering this card in the following challenges:
Word Art Wednesday #71 - Anything Goes
Cute Card Thursday - Anything Goes
Scrap Creations - Use Favorite Embellishment (mine is pearls, followed closely by bling flourishes, ribbon & flowers)
Catered Crop - Frame or mat
Clearly Inspired Challenge #70 - Die Cuts
Sentimental Sunday #145 - 3 embellishments that start with B (bow, bling, pink bloom)
Stamptacular Sunday #206 - Dies
Ribbon Carousel #78 - Spring is in the Air
Dream Valley Challenge - Mother's Day/Card for Female
Terrifically Thrilling Thursday - Roll 'em {I rolled 1 (die/punch), 5 (dimensionals), 7 (glitter)}
Craft Your Passion #153 - 2 colors plus neutral (nothing says spring to me like pink flowers)
Spark Your Creativity Challenge #7 - Anything Goes
{Cupcake Inspirations} Challenge 201 - I was inspired by the floral motif and the overal pink and green color scheme
Please be sure to leave a comment below and visit the rest of the design team's blog and leave a comment. One of us is a "mystery blogger" and a random comment will be chosen from her blog to receive the entire March Digi Release.
Thanks for stopping by today. Come back soon. I have another project with this release to show you.
Subscribe to:
Posts (Atom)