Friday, November 30, 2012

Bundle of Joy - SNSDC81

This week's challenge at the Sweet 'n Sassy Digi Challenge Blog is to decorate the interior of your card (what I call "interior decorating").  I really enjoy decorating the inside and adding little touches to make it special too.


I matted the sentiment and popped it up over a bling flourish.  A little pink bling adds some interest under the sentiment.  A pretty bow adds another girly touch to the front. This card was made using the scraps left over from the baby album I made a couple weeks ago and was sent with it to Japan.  Precious Leah surprised everyone and arrived a couple weeks early.  Mama & baby are doing well.  {The cover of the album can be seen here.  I'm still working on editing the photos for the rest of the album and then I'll post them. }

For the interior decorating, I decorated both inside panels.  On the left side I matted Psalm 127:3.


For the right side, I added a punched border above the sentiment.  I added a little more bling between the scallops. 


Supplies:
Card base:  Bazzill
Cardstock:  Georgia Pacific
Patterned Paper:  Basic Grey (Sweet Threads)
Stamps:  Sweet 'n Sassy Digis (Baby Blessings)
Embellishments/Tools:  ribbon (Ribbon Trends), bling (Prima, Best Occasions), border punches (Fiskars - Apron Lace & Threading Water), Spellbinders (Petite Scalloped Ovals, Petite Ovals)

I'm entering this card in the following challenges:
Word Art Wednesday #56 - Anything Goes/encouraging sentiment
Paper Pretties Monday Challenges (PPMC67) - Anything Goes
Paper Pretties Wednesday Challenge (PWC234) - Girly Cards
Simon Says Stamp - Anything Goes
Pile It On Challenge #48 - Anything BUT a Christmas Card
Tuesday Throwdown #125 - Lots of Layers
Spark Your Creativity Now! Challenge #3 - Anything Goes
Terrifically Thrilling Thursday - Use Scraps


I'm so glad you visited today.  I hope you'll play along in this week's challenge and let us see your interior decorating.


Thursday, November 29, 2012

Friends of SNSS Blog Hop

This is my 2nd post for today.  Please scroll down one post to see my last guest design project for Daydream Designs.

Today I have the honor of participating in the Friends of Sweet 'n Sassy Stamps (SNSS) Blog Hop!  You'll want to visit as many blogs along the way as you can because one commenter on four of the blogs will be chosen to receive a $15 store credit.  To be included in the drawing, you must leave your comments by midnight EST, Friday, November 30th.  The winners will be announced on the SNSS blog on Sat., Dec. 1st.

I first became acquainted with SNSS shortly after the company first started 5 years ago.  What initially drew me to SNSS was that they had KJV Scripture stamps.  Those are hard to find and I was so excited to find so many in one place.  THEN I discovered digi stamps and Cocoa and Rhubarb and....  well, I was hooked pretty quickly!!  I was so honored in early 2011 when Korin asked me to help promote SNSS on what was then the Christian Paper Crafts site.  In May of that year, I was even more honored when she asked me to be a member of the SNS Digi Challenge design team.  Last month I became the DT Coordinator for that team and love using SNSS stamps & digis more than ever.

For my project for the hop, I wanted to show you a simple door sign I made for our daughter's college dorm door.  When she first saw this digi, she instantly asked, "Could you make me a Merry Christmas sign for my door and use that Cocoa?"  Of course, I said, "Yes."  I'm going to miss these requests after she gets married next spring.


Since it's for a door and needed to stay light so that sticky-tack will hold it up, I kept the design CAS.  Before printing, I separated the sentiment into two lines in Word to keep things more balanced.  Gotta love that about digis! I colored the image with copics and added some shading/texture with a colorless blender.   I used my Grand Big Scalloped Oval nesties for the layers.  I traced and hand-cut the solid red mat because I needed it that in-between size. The plaid layer is actually pieced together.  I was using scraps and didn't have a piece big enough so I put two pieces together and lined up the plaids.  I taped it together, placed the die strategically, then die-cut and embossed it.  Since it has layers on top of it, you really can't tell from the front unless you look at it very closely.  I don't even think our daughter noticed....shhh don't tell.  :)


I used some Crystal Effects on the candy cane and Cocoa's nose for dimension, added Frosted Lace Stickles to the marshmallows, and gave the snowflakes some sparkle with Star Dust Stickles. 

Supplies:
Cardstock:  Express-It, Bazzill
Patterned Paper:  Echo Park (Season's Greetings)
Stamps:  SNSS Digis (Sweet Cocoa, Christmas Sentiments)
Inks:  Copics (N0, N1, N3, N5, N7, G14, G17, R27, E01, Colorless Blender)
Embellishments/Tools:  SU Crystal Effects, Stickles (Frosted Lace, Star Dust), Spellbinders Grand Big Scalloped Ovals

I'm entering this project in the following challenges:
Word Art Wednesday #56 - Anything Goes
Stampin' Sisters in Christ #167 - Christmas
The Crafty Pad - Glitter
Craft Your Passion - Holiday Edibles (candy cane)
Paper Pretties Monday Challenge (PPMC67) - Anything Goes
Scrap Creations - Christmas
Whimsy Stamps #53 - Traditional Christmas Colors
Simon Says Stamp - Anything Goes
Spark Your Creativity Now! Challenge #3 - Anything Goes
Terrifically Thrilling Thursdays - Use Scraps

Thanks for hopping by today.  Don't forget to leave comments as you hop along so that you'll have the best chance to win one of the four $15 prizes hidden among all the participating blogs.  Be sure to stop by the SNSS blog on Sat., Dec. 1st, to see if you are the winner.

Please also come back tomorrow for the new SNS Digi Challenge.

Expressly for You

It's hard to believe that this is my last post as a Guest Designer for Daydream Designs.  Wow!  The month flew by.  I'd like to take this opportunity to thank Diane for allowing me the honor of being a Guest Designer this month. I have really enjoyed working with her digis and she is such an encourager.  What a blessing!!    Diane has such a great variety in the store -- if you haven't already visited there, I hope you will soon.  You are sure to find something (or a lot of somethings) that you will like.

With Christmas quickly approaching, and with gift cards an increasingly popular item to give, I thought I'd make a gift card holder this week.  I found this Tri-Fold Gift Card Holder tutorial on YouTube by Holly Krautkremer that was perfect for what I wanted to do.  It's quick, easy, versatile, and cute!  What's not to like?  I used her tutorial as a starting point and changed things up a little to suit me.  :) My biggest changes were that I didn't make the pocket as deep and used matted patterned paper instead of stamping on cardstock.  Closed, the holder measures 4" wide and 3" tall.  You can get two holders (not including any matting) out of one sheet of 8.5" x 11" cardstock.  It's also a great project to use up some of those scraps that are lurking around in your stash.


I found a partial sheet of this coffee themed paper in my scrap stash.  It's a perfect choice for a coffee gift card and goes well with the kraft cardstock base. I matted the patterned paper on a burgundy cardstock.  The cardstock had a white core that I didn't want to show so I inked the edges of the cardstock and the kraft base.


The holder is kept closed with a belly band.  For the belly band embellishment, I die cut and matted the pre-colored coffee cup with whipped cream from The Perfect Blend set and used them to cover where the ends of the belly band meet.  I don't like to have the "raw" ends visible when doing projects like this so I always try to cover them in some way.  I used Frosted Lace stickles for the whipped cream and added some Star Dust stickles for the steam.  I used a Sakura glaze pen to add a little shine for the coffee.  I also used another "odds & ends" find from my stash and used these tiny pearls around the outer edge.  I love pearls so I think these have been in my stash so long because they are so tiny.  They're all gone now though.  :(


When you open the holder, you have three panels.  In the top panel, I used the matching line art image as a watermark and used one of the sentiments from the Coffee with Friends Sentiments set over it.  The middle panel is where the gift card is attached.  In the bottom panel, there is a pocket for a tag or card to write a message to the recipient.  I used another of the pre-colored images from The Perfect Blend set as my card/tag front and matted it on kraft cardstock.  Below is a picture of the tag outside of the pocket.


I can see this gift holder being used for so many different types of gifts.  It could actually hold up to 3 gift cards.  I'm sure you can come up with lots of ideas on your own but here are some quick gift ideas I came up with as I thought about all the ways to use this holder for special gifts:

1.  Give someone a Girl's Day Out and include gift cards for a manicure/pedicure, a favorite shop and their favorite lunch spot.
2. I'm a firm believer in dating for married couples. :) Friday night is date night around here (after almost 28 years of marriage I must admit some dates consist of McDonald's and a trip to Walmart or a $5 pizza and DVD from Redbox, but the point is time spent together.)  So of course my mind ran towards date night gift cards.  You could include cards for dinner at a restaurant, frozen yogurt,  & coffee.  They could have one big "night on the town" or several smaller date nights.
3.  Give new parents gift cards for baby shops, grocery stores and a date night.
4.  Give newlyweds gift cards to places they've registered and/or a discount store (Target, Walmart, etc.) for items they might need but didn't receive.
5.  If most college students are like the ones from our house, give college students Walmart/Target/etc., coffee and food gift cards.

Supplies:
Cardstock:  Paper Studio (kraft), Recollections (parchment), DCWV (burgundy), Express (white)
Patterned Paper:  Flair Designs (Coffee Talk)
Stamps:  Daydream Designs Digi Sets (Coffee With Friends Sentiments, The Perfect Blend)
Ink:  SU (Creamy Caramel)
Embellishments/Tools:  Spellbinders (Standard Circles Large & Small, Lacey Circles, Deckled Rectangle Small), Fiskars border punch (Threading Water), SU Slit punch, Sakura Glaze pen, Stickles (Frosted Lace, Star Dust), SU Jewels (Basic Pearls)

I'm entering this card in the following challenges:
Pile It On Challenge #48 - Anything BUT Christmas card
Word Art Wednesday #56 - Anything Goes
Paper Pretties Monday #67 (PPMC67)  - Anything Goes
The Kraft Journal - Holiday Gift idea
Shopping Our Stash #79 - Use odds & ends from your stash (my paper and pearls)
Tuesday Throwdown #125 - Lots of Layers
Simon Says Stamp - Anything Goes
Spark Your Creativity Now! Challenge #3 - Anything Goes 

Thanks for stopping by today.  I hope you'll give this little gift card holder a try.  More importantly, I hope you'll go shopping at Daydream Designs and pick up some fantastic digi stamps & papers.

Friday, November 23, 2012

Butterfly Gift Set - SNSDC81

I hope each of you had a wonderful Thanksgiving.  Our daughter and her fiance are here for the weekend.  They helped me cook (or maybe I helped them cook) dinner for us and for my husband's mom, brother & niece.  It was a nice day and the weather is fantastic.  I missed our son and his family.  He works retail in another state and works Thanksgiving Day and all weekend.  It was the first time in his life I haven't been with him on Thanksgiving (honestly, I'm sure it bothered me more than him).  I realized today what a privilege I've had to get to spend that many with him. I know the day will come when I won't have either one of our children with us on the holidays but I'm going to enjoy it and treasure it for as long as it lasts.  :)

In honor of Black Friday and the official start of the Christmas shopping season, The Sweet 'n Sassy Digi Challenge Blog is challenging us to make a card or project that has an image of a gift or is a gift.  I chose to make a gift set.


One of the companies where I used to work purchased black markers by the dozen.  They came in these cool plastic bins.  The company would just throw the bins away so I received permission to take them off their hands.  :)  They make great gift set boxes.  I've used them before for card sets here & here

For the cover of the box, I used one of the sentiments from the Everyday Miracles set and printed one of the butterflies from the set twice on patterned paper.  I then used copic markers to add some teal color.  Some pearls make up the butterflies' bodies and bling added their flight trail. I bent the wings a bit and only glued them down in the middle so they would have dimension. They are layered with a couple mats onto a lacey circle.  Some baker's twine finishes it all off.

This time I included a couple of notebooks with a set of 6 cards and envelopes.  Note:  The envelopes aren't pictured because they still need to be made or purchased. 

Here is a view of all the items in the box and what it looks like with the lid opened.  By adding paper to the inside of the lid, I didn't have to worry about any adhesive showing.  


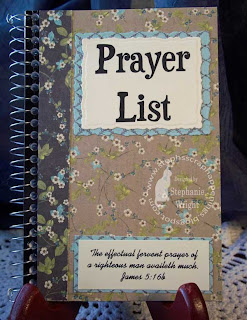
Here are close-ups of the two notebooks.  They are approx. 4" x 6".  I thought the "Notes" book could either be used for sermon notes or just as a general note pad to keep in a purse.  I kept the covers pretty plain/flat so that embellishments would not get knocked off during use.


 This is the inside cover of the Prayer List notebook.  I thought this quote by John Bunyan was quite a good reminder.


The cards are also 4" x 6".  I also kept them flat so that the recipient of the gift would not have to use extra postage when she mails them.  As you can see, the basic design is the same while I used leftovers from all the other papers used in the project.  I used this sentiment because it is so generally appropriate -- whether you're just saying "hello" or lending support during a rough time. The insides of the cards are plain.


Supplies:
Cardstock:  Bazzill (Two Scoops -Moose Tracks), Recollections (cream)
Patterned Paper:  Prima (Madeline)
Stamps:  Sweet 'n Sassy Digis (Everyday Miracles, Pray Without Ceasing, Praying for You, Rejoice in the Lord)
Embllishments/Tools:  brads (JoAnn's), baker's twine (The Twinery - Honeydew & Cappuccino), bling (Prima), pearls (Prima), Copics (BG01, BG000), Spellbinders (Petite Ovals Small, Petite Scalloped Ovals Large, Standard Circles Large & Small, Lacey Circles, Deckled Rectangles Large & Small), SU Corner Rounder

I'm entering this set in the following challenges:
Word Art Wednesday #55:  Positive sentiment
Paper Pretties Monday Challenge (PPMC66):  Anything but a card
Stamptacular Sunday #190:  Recipe Challenge {ribbon or twine (twine), pearls or gems (both), punches or dies (both)}
Spark Your Creativity Now! Challenge #3 - Anything Goes
Cute Card Thursday #244 - Featuring a Girl or For a Girl (mine is for a girl)

Thanks so much for stopping by today.  Be sure to stop by the Sweet 'n Sassy Store for their specials.

Thursday, November 22, 2012

Let Your Light So Shine...

Happy Thanksgiving!!!

Today is the day, in America, that we set aside to remember all our blessings...and to eat a wonderful  meal with our friends and families.  We're enjoying having our daughter, her fiance, my mother-in-law, brother-in-law and niece join us at our house today. If you are visiting here on Thanksgiving, thank you for sharing part of your day with me.  I truly am thankful for my readers and am honored that you stop by to visit. For those of you that take the time to leave a comment, please know that I appreciate each and every one of them.  I understand the sacrifice of time it takes to leave a comment and it makes my heart smile to read your comments on my cards/projects.

When I saw this Scripture digi in the the new Scripture Digi sets by Daydream Design, I couldn't wait to use it as the focal image on a card. This verse is such a great reminder that we're to live so that our lives bring glory to our Heavenly Father who has truly given us so MUCH.

I recently "found" this double-sided patterned paper at my local scrapbook store (aka LSS) and thought it would showcase a Scripture focused card perfectly.  One side is this poppy pattern and the other a deep red pattern.  I also had a new set of Spellbinders dies that I'd gotten for my birthday and couldn't wait to use them either. :)


I used layered both sides of the patterned paper with a piece of parchment paper between.  After cutting out the Scripture, I matted it with the dark red side of the paper and layered it on a floral oval spellbinders panel.  All my edges were inked. A gold ribbon bow, a pearly button, pearls and liquid pearls finished it off. My finished card is 5" x 7".  I've been breaking out of my standard 5.5" square box a little lately.  No promises on this trend continuing.  :)

Supplies:
Card base: Paper Company
Cardstock: Recollections
Patterned Paper:  Bo Bunny (Serenade Poppies)
Ink:  SU (Creamy Caramel)
Stamp:  Daydream Designs Digi (Dream Team Scripture Set 2)
Embellishments/Tools:  pearls (Recollections), button (misc. from my stash), ribbon (Michael's), Liquid Pearls (Platinum Pearl), Spellbinders (Labels 4, Labels 4 Small, Floral Ovals), SU ticket punch

I'm entering this card in the following challenges:
Spark Your Creativity Now Challenge #3 - Anything Goes
Stamptacular Sunday #190 - Recipe Challenge: Pearls or Bling (pearls), Ribbon or Twine (ribbon), Dies or Punches (both)
Papertake Weekly - Ribbon and/or Pearls (I have both)
Divas by Design #62 - Two or more patterned papers (2)
Word Art Wednesday #55 - Scripture/Sentiment


I wanted to mention a little more about these special Scripture sets.  Diane had each of her Dream Team submit their favorite Scripture verse.  She then turned each of them into a beautiful & unique digi stamp.  There are 3 sets in all.  If you enjoy using Scripture on your cards, scrapbook pages, and other projects, you will definitely want to check these out.

Thanks for stopping by today.  I hope each of you are enjoying the day with those you love.  Happy Thanksgiving!!


Friday, November 16, 2012

November Digi Release & a Sale!!


Sweet 'n Sassy Stamps is celebrating their 5th Birthday.  Part of the celebration is a 25% off sale on all their digi stamps November 15th-21st.  This sale includes the 3 new digis that were just released yesterday. All 3 are so cute you'll want all 3 and at 25% off, now is the perfect time to pick them up.

This week's challenge is to make a shaped card -- no squares or rectangles.  I got to play with two of the new stamps:  Eskimo Kisses Colored Digital Stamp and Eskimo Kisses Sentiments Digital Stamp Set.  These pre-colored stamps help your card come together soooo quickly!  This week, if you enter a card in the challenge you will have a chance to win a $20 digi stamp shopping spree at the SNS store.  If you use a SNS digi on your card, your entry will count twice.

I chose to make a circle card.  Since I was working with a pair of Eskimos, I knew I wanted snow and lots of white. This card has LOTS of shimmer but was very easy to put together. I embossed the white panel with a snowflake embossing folder and then accented all the snowflakes with stickles.  The fur on the girl's coat is accented with star dust stickles and the fur on the boy's coat is accented with frosted lace stickles.  The image panel is backed with a shimmery blue cardstock.


I used the sentiment set on the inside of the card.  I accented the words with more stickles and lined the interior with more of the shimmery blue cardstock. {sorry for the shadow on the lower right side -- low light this morning & I had a feline helper}


Supplies:
Cardstock:  Georgia Pacific (white), DCWV (blue)
Stamps:  Sweet 'n Sassy Digi (Eskimo Kisses Colored Digital Stamp, Eskimo Kisses Sentiments Digital Stamp Set)
Embellishments/Tools:  Cuttlebug embossing folder (Snowflakes), Stickles (Star Dust, Frosted Lace), Sakura Clear Star Pen, Spellbinders (Classic Circles large & small, Lacey Circles)

I'm entering this card in the following challenges:
Love to Create #41 - Fancy Edges
Craft Your Passion #136 - CAS (for me, this is as clean & simple as it gets :) )
Word Art Wednesday #54 - Sentiment
4 Crafty Chicks #116 - Winter
Spark Your Creativity Now Challenge #3 - Anything Goes
Clearly Inspired Challenge #64 - CAS

Come play along with us this week and link up your card for a chance to win a digi-stamp shopping spree.

Thanks for stopping by today. 

Thursday, November 15, 2012

In Sunshine or Rain...


I love to paper piece. When I saw the umbrella in this stamp set by Daydream Designs, I knew it was just made to be paper pieced.  I ended up paper piecing the entire image.  I did take a little help from my Copic and colored the top of the pocket instead of trying to line up that tiny piece.  Copics also added a tiny amount of shadow around the image. 


After die-cutting the image panel, it was matted on a petite scalloped oval panel.  To go along with these beautiful Prima papers, I added quite a bit of pearl & sparkle.  A pair of tweezers made applying the individual pearls a breeze.  A pearl was also added to the center of the umbrella.  Pearls were also added to the decorative photo corners.


The entire umbrella was given a coat of stickles for some extra pizzazz. The large flower in the upper left corner had some glitter already on it.  However, it also got a little attention from the Stickles bottle as did the two smaller flowers. The ribbon used to keep this gate-fold card closed also has some shimmer so as you can tell, this card is not lacking for sparkle!


I enjoy making gate-fold cards and just can't help but do "interior decorating" on them.  I used two of the sentiments that coordinate with this stamp set and printed them to be one thought: "Sunshine or rain...I'm here for you."  I didn't want to cover up all the pretty patterned paper, so I matted the sentiment on an oval and let the paper be the star.


Supplies:
Cardstock:  Georgia Pacific, Bazzill (Two Scoops - Cherries Jubliee)
Patterned Paper:  Prima (Madeline)
Stamps:  Daydream Designs digis (Sunshine and Rain Sentiment Set, Sunshine and Rain Digi Set)
Ink:  Copic Markers (C0, E29, Colorless Blender)
Embellishments/Tools:  pearls (The Paper Studio), ribbon (Ribbon Trends), flowers (Prima), Spellbinders (Decorative Photo Corners, Petite Ovals Small & Large, Petite Scalloped Ovals Large), Stickles (Star Dust)

I'm entering this card in the following challenges:
Papertake Weekly - Flower Power
Divas by Design #61 - Anything Goes
Word Art Wednesday #54 - Anything Goes/Sentiment
Chocolate, Coffee & Cards Challenges #25 - Use Stripes (mine are on the interior of my card)
Stampin' Sisters in Christ #165 - Something broken brought back together (the front panel of my card is "broken" and brought back together by the image panel & ribbon)
Spark Your Creativity Now Challenge #3 - Anything Goes

The two sets I used on this card also have a coordinating digi paper set and a pre-colored image set available.  Daydream Designs has stamps for all occasions.  I hope you'll stop by the store and pick up some for yourself.

Thanks for visiting today.  Come back soon!!


Friday, November 9, 2012

SNSDC79 - Thankful for YOU

It's time for another challenge at the Sweet 'n Sassy Digi Challenge Blog. This week we want to see your Thanksgiving cards and projects.


This week's card is sized to fit in a regular business size envelope.  I colored my Pumpkin Patch digi with copics and then inked it before removing it from the petite oval die. I did the same thing with the "Thankful for You" sentiment.  "Happy Thanksgiving" wasn't cut out with a die so I just inked the edges.  The card base and all mats at kraft cardstock.


I used some stickles on the pumpkin leaves for a little sparkle.


A flower and button help accent the end of the "Happy Thanksgiving" banner.  Some jute and a little bling finish off the card.

Supplies:
Cardstock: The Paper Studio (kraft), Bazzill embossed cardstock (Luscious Lime), Georgia Pacific (white)
Patterned Paper:  Crate Paper (Farmhouse)
Stamps:  Sweet 'n Sassy Digis (Gobble Gobble Sentiments, Pumpkin Patch)
Ink:  Tim Holtz Distress Ink (Antique Linen), Copics (YG03, YG05, G17, C0, Y11, Y35, YR07, Colorless Blender)
Embellishments/Tools:  rhinestones (MAMBI), jute (Michael's), button (La Mode), Stickles (Star Dust), flower (Porta Folia), Creative Memories square punch, Spellbinders (Petite Ovals Small & Large, Deckled Rectangles Small & Large)

I'm entering this card in the following challenges:
Stampin' Sisters in Christ #164 - Thanksgiving or Thank You
The Crafty Pad #195 - Anything Goes
Love to Create #40 - Shades of Autumn
Krafty Outlet - Harvest
Sketch with a Twist #19 - sketch & twist of using at least 2 sentiments
PaperTake Weekly - Anything Goes
Tuesday Throwdown #123 - Autumn Leaves
Going Gray with Scrap Creations - Use a digi
Word Art Wednesday #53 - Sentiment
52 Card Pickup #45 - make a card
Spark Your Creativity Now! Challenge #3 - Anything Goes

Thanks for stopping by today.  I hope you'll play along with us this week and show us your Thanksgiving cards and projects.

Thursday, November 8, 2012

A Morning Without Coffee....

I am excited to announce that I am a Guest Designer for Daydream Designs this month.  Diane has a wonderful assortment of digi stamps for all occasions, Scripture digis and beautiful digi papers.  Be sure to stop by, browse thru her store, catch up on the latest happenings on the blog, and sign up for the newsletter.  For those on Facebook, why not "like" the Daydream Designs Facebook page?   This way, you won't miss a thing.  I'll be posting a project featuring Daydream Designs digis each Thursday this month.


For my first Daydream Designs project, I made this card using a couple different sets.  My coffee cup is from The Perfect Blend digi set which contains 19 images (some are pre-colored). The sentiment is from the Deja Brew Digi Sentiment set which contains 13 coffee themed sentiments.

I paper pieced the coffee cup and added some SU Crystal Effects to the coffee for a little dimension & shine.  Since this card is intended for my coffee-loving daughter, I embossed her initial on the cup (Sorry, that initial is not a Daydream Designs stamp). After cutting out the cup, I popped it up on an embossed panel. The swirls on this panel remind me of steam. Some bling "steam" was added as well.


The sentiment tag was also popped up off the card base.  Some jute, "metal" dots and minor interior decorating finished off the card.

Supplies:
Cardstock:  The Paper Studio (kraft), Bazzill (teal), Recollections (cream)
Patterned Paper:  MME (Dilly Dally Hello Flannel)
Stamps:  Daydream Designs Digis (Deja Brews Sentiments, The Perfect Blend), Studio G ("K")
Ink:  Stampabilities Embossing Ink pad
Embellishments/Tools: Stampendous embossing powder (Midnight Black), Jute (Michael's), black metal dots (Best Occasions), bling (Recollections), eyelet (American Crafts), Spellbinders (Standard Circle Small, Eyelet Circle), Cuttlebug Embossing Folder (D'vine Swirl), EK Success Corner Rounder, Crop-o-dile, SU Crystal Effects

I'm entering this card in the following challenges:
Sentimental Sundays #127 - Dimensions
The Crafty Pad #195 - Anything Goes
Friends of Speedy TV #45 - Anything Goes
Clear it Out Challenge - Anything Goes with a touch of Red
Going Gray with Scrap-Creations - Must use digi
Word Art Wednesday #53 - Sentiment
52 Card Pick-up #44 - Make a card
PaperTake Weekly - Anything Goes
Spark Your Creativity Now! Challenge #3 - Anything Goes

I hope you'll stop by Daydream Designs and pick up a few digis of your own.  You won't be disappointed with the quality.

I'm so glad you stopped by today.  I hope you'll come back soon.

Friday, November 2, 2012

Paper Bag Album -- SNSDC78

Since it's Friday, it's time for another challenge over at the Sweet 'n Sassy Digi Challenge Blog.  This week's challenge is to make Anything But A Card.  Yep, the sky is the limit as long as it is not a card and uses digi stamps.

I've been seeing some cool paper bag albums on You Tube and decided to give one a try.  I combined the techniques by Kathy Orta and Vianneylu1.  This baby album needs a bit more interior decorating, so I'm just going to show you the cover today.  I'll share the rest of the pages as soon as I can.  You can see a hint of what's inside on the right side of the photo below.  Some ribbon pulls for pull-out tags are seen sticking out of the album.  :)  The album is approx. 9" x 6".


I used Cocoa's Baby Block digital stamp for the focal image on the album cover.  However, I decided that I didn't want to have the letter "B" in the block but I wanted the baby's first initial instead.  Using PSE, I removed the "B" and added an "L."  This is one of the wonderful things about digi stamps....you can change them up a bit to suit your needs.


I colored Cocoa with my copics and paper pieced the block and the letter.  I cut out the entire image and popped it up on the pink layer.  I added a small piece of pop dot under part of Cocoa's tail and glued the rest of it directly to the pink circle.  This had a two-fold purpose.  I was afraid Cocoa's tail would get torn off if it wasn't completely attached and popping part of it up gave it added dimension.


After adding the entire circle focal panel to the cover with pop dots so that it would be above the bling flourish (which was cut in half and spread out to cover the entire diagonal of the cover), the "L" on the block was covered with star dust Stickles and Cocoa's nose got some SU Crystal Effects for a little shine.


I used a border strip of flowers from the paper collection and added them to the binding with some additional bling for the flower centers.  The binding strip was edged with Spellbinders Edgeabilities.


Cover Supplies:
Cardstock:  Recollections, Express
Patterned Paper:  Basic Grey (Sweet Threads)
Stamps:  Sweet 'n Sassy Digi (Cocoa's Baby Block)
Ink:  Copic Markers (N1, N3, N5, N7, R20, E000)
Embellishments/Tools:  Prima Say It In Crystals flourish, rhinestones (Best Occasions, Recollections), Stickles (Star Dust), SU Crystal Effects, Spellbinders (Standard Circles Large & Small, Lacey Circles, Classic Edges 2, Classic Decorative Inserts 5)

I'm entering this project in the following challenges:
Paper Pretties Monday Challenge (PPMC63) - Bling
Whimsy Stamps #52 - All Things Sparkly
Word Art Wednesday #52 - Encouraging project
Basic Grey Challenges #80 - Anything Goes (I used BG Sweet Threads papers)
Spark Your Creativity Now! Challenge #3 - Anything Goes
Clearly Inspired Challenge #63 (CIC63) - Critters

I hope you'll play along with us this week and make anything but a card.

Thanks for stopping by today.  I'll try to be back soon with the rest of the album.


LinkWithin

Related Posts Plugin for WordPress, Blogger...